Elearning Storyboard Template: Process and Review Workflow
Instructional designers frequently make a catastrophic operational mistake natively. They receive raw presentation files from subject matter experts initially. Immediately, they open complex authoring software blindly. They start building interactive slides without any formal plan securely. Consequently, this unstructured approach always leads to total disaster completely. Teams waste countless hours rebuilding complex digital interactions constantly natively. Stakeholders inevitably request massive fundamental changes later securely. Therefore, professional development teams prevent this expensive rework completely. They rely on a highly structured document initially natively. Specifically, they use a standardized elearning storyboard template proactively. This occurs before they ever touch an authoring tool natively.
A storyboard acts as your foundational architectural blueprint completely securely. It maps your entire digital training module perfectly natively. Furthermore, it forces stakeholders to agree on the core script entirely. Modifying text takes exactly five seconds natively. However, modifying a synchronized custom animation takes five hours securely. Therefore, you must master the planning phase completely natively. Next, we will explore this vital operational process perfectly. Ultimately, structured planning saves immense corporate resources natively.
Key Takeaways

Never Skip the Planning Phase:
Using an elearning storyboard template forces stakeholders to agree on content, scripts, and visual design before development begins, saving countless hours of expensive rework in the authoring tool.
Include Five Essential Elements:
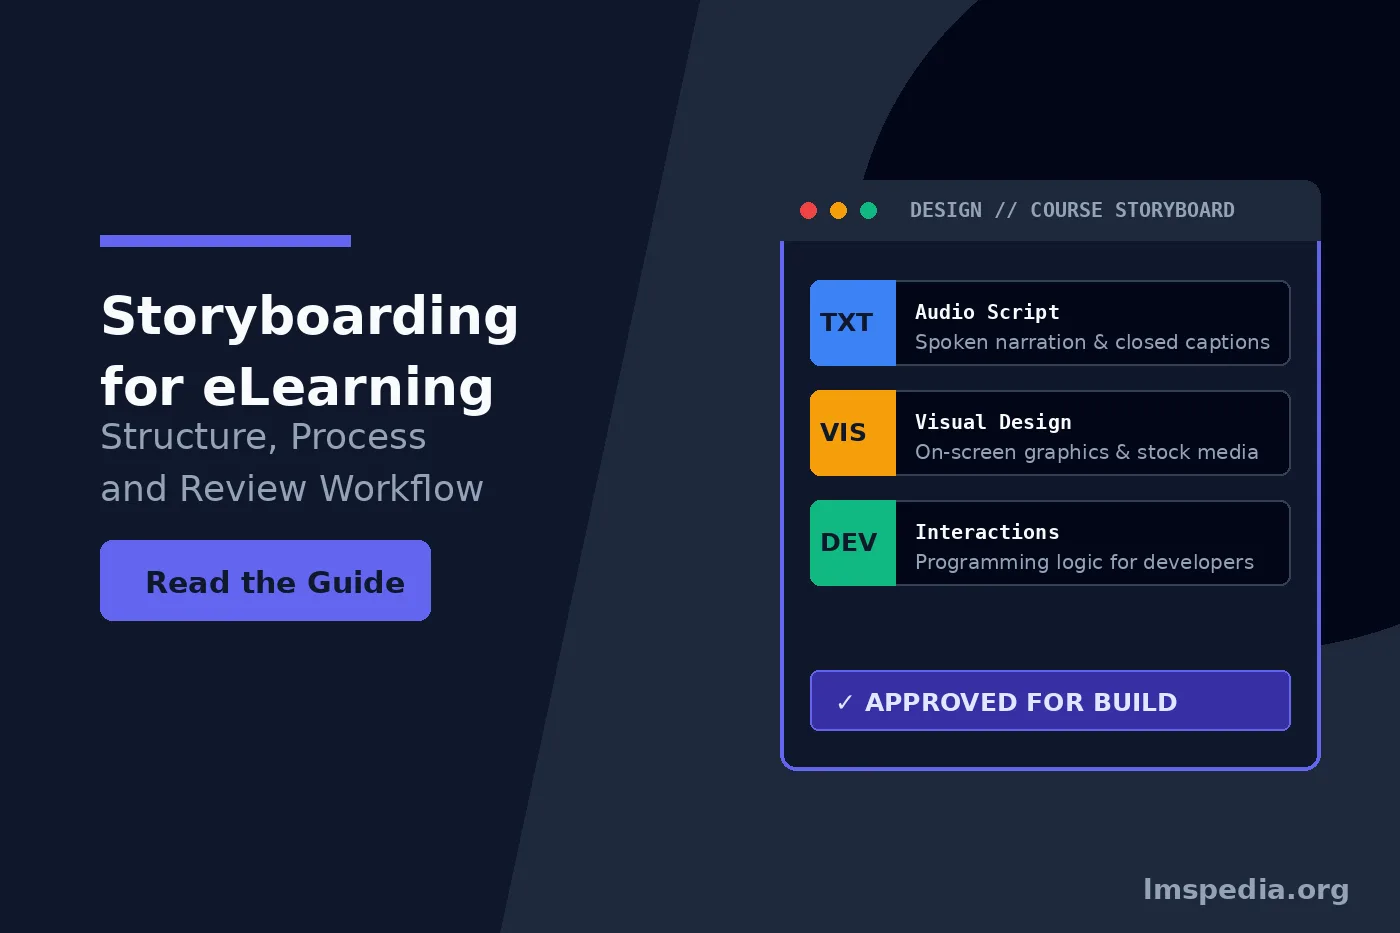
Every storyboard must clearly document a unique slide ID, the exact audio narration script, detailed visual descriptions, the on screen text, and precise programming instructions for developers.
Match the Format to the Project:
Use text based Word documents for heavily narrated compliance courses. Use visual PowerPoint templates for highly graphical modules. Use rapid software prototypes for complex, interactive branching scenarios.
Write for the Spoken Word:
The audio script drives the learning experience. Always draft the script first, write in a natural conversational tone, and read it aloud to ensure it sounds human and engaging.
Enforce Strict Review Boundaries:
Your storyboard review workflow must include a firm deadline and a limited number of stakeholders. Use cloud based collaborative documents to prevent version control chaos and conflicting feedback.
What is a Storyboard for Online Courses?
A storyboard for online courses represents a comprehensive planning document natively. It maps out every single screen perfectly securely. Furthermore, it details every interaction and audio file natively. Think of it as a technical movie script entirely. It bridges the gap between designers and developers perfectly securely. Therefore, it keeps large projects completely on schedule natively.
Removing Ambiguity from Development
A high-quality storyboard removes all ambiguity completely natively. When a developer receives the document, they work efficiently securely. They should never have to guess technical functions natively. Specifically, they must know exactly what images appear natively. They must know exactly what the narrator says instantly securely. Furthermore, they need exact button click behaviors defined thoroughly natively. To explore overarching digital content standards, consult external authorities proactively. Review resources from the Association for Educational Communications and Technology today natively. Consequently, adhering to these global standards improves your output perfectly securely. Ultimately, rigorous planning defines true instructional design professionalism natively.
Elements of an Elearning Storyboard Example
Every organization customizes its documentation slightly differently today natively. However, every effective elearning storyboard example contains universal data points securely. If you omit these critical elements entirely, problems arise natively. Developers will make incredibly costly incorrect assumptions securely. Therefore, you must include the following structural components always natively.
Slide Identifier and Title
Every screen needs a unique identifier code natively. You might label a slide numerically like section two slide four securely. Specifically, this unique identification remains critical for version control natively. When a reviewer leaves feedback, they reference this ID completely securely. Furthermore, you must include a clear descriptive title proactively natively. This provides immediate context for the entire production team securely. Therefore, organization prevents massive confusion during complex reviews natively.
Audio Script and Narration
This section contains the exact spoken words natively. You must format this specific text perfectly securely. Include explicit pronunciation guides for difficult industry jargon natively. Furthermore, if you want the narrator to pause, document it securely. You must type explicit pause instructions into the script text natively. Consequently, the voiceover artist delivers a perfectly paced performance securely. Ultimately, clear scripts prevent expensive audio re-recording sessions completely natively.
Visual Descriptions
You must describe exactly what learners see visually natively. Do not simply write vague requests for pictures securely. Instead, write highly specific visual instructions completely natively. For example, instruct the developer to insert a high-resolution image securely. Describe the specific corporate environment you want depicted perfectly natively. Furthermore, include exact file names if you pre-selected stock photos securely. Therefore, the visual aesthetic matches your specific design vision exactly natively.
On-Screen Text
On-screen text differs significantly from the audio script natively. You should never force learners to read matching text securely. This specific redundancy creates massive cognitive overload instantly natively. The on-screen text section should only include bullet points securely. Furthermore, it should highlight critical terminology that supports the audio natively. Consequently, learners absorb the primary educational concepts much faster securely. Ultimately, concise text improves overall knowledge retention significantly natively.
Developer Instructions and Interactions
This represents the most critical technical section completely natively. You must explicitly define how the screen behaves securely. If you design a complex interaction, write out exact mechanics natively. Detail exactly what happens during a mouse hover event securely. Detail what specific popup appears upon a successful click natively. Therefore, providing comprehensive instructions prevents annoying software bugs entirely securely. Consequently, your multimedia developers build the course much faster natively.
Choosing Your Elearning Storyboard Template Format
Instructional designers typically choose between three distinct formats natively. Your specific choice depends entirely on your team size securely. Furthermore, it depends on your specific preferred authoring tools natively. Next, we will examine these three popular layout formats closely securely.
The Text-Based Word Document
Many teams build templates in simple word processors natively. Each row represents a single learning screen perfectly securely. The columns represent audio, visuals, and programming instructions clearly natively. Specifically, this format works exceptionally well for compliance courses securely. Text documents remain incredibly easy for experts to review collaboratively natively. Furthermore, they can use standard track changes features effortlessly securely. Therefore, script modifications happen rapidly without complex software training natively.
The Visual Presentation Template
Visual templates utilize slide presentation software natively. The designer builds a rough low-fidelity mockup securely. They place the audio script in the bottom notes section natively. Furthermore, they include developer notes in this exact same area securely. This format excels when you design highly visual courses natively. Stakeholders can actually see the spatial layout perfectly securely. Therefore, they approve the visual design before development actually begins natively.
The Rapid Prototyping Approach
Agile development teams often skip static documents entirely today natively. Instead, they build a rapid prototype directly within software securely. They use simple grey boxes instead of final images natively. Furthermore, they use robotic text-to-speech audio temporarily securely. They publish this rough draft for immediate stakeholder review natively. Consequently, stakeholders actually click through the functional course navigation freely securely. You can explore agile methodologies via the Articulate E-Learning Heroes community directly natively.
Software Tool Comparison for Course Development
Selecting the proper software impacts your storyboarding strategy entirely natively. Some platforms accept imported text documents perfectly securely. Others require manual data entry by your development team natively. Therefore, understanding your software limits remains critical during planning securely. Next, we compare three highly capable platforms for corporate training natively.
| Platform | Prototyping Capability | Workflow Integration | Primary Target Audience |
|---|---|---|---|
| SimpliTrain | Advanced native authoring tools | Seamless review integration | Enterprise training teams |
| Articulate 360 | Powerful rapid prototyping | Review 360 collaboration | Traditional instructional designers |
| Adobe Captivate | Complex simulation mockups | Advanced variable planning | Technical software developers |
The Course Storyboard Process Step by Step
You cannot simply open a blank template natively. You absolutely cannot start typing slide one immediately securely. Effective design requires highly systematic preparation natively. Therefore, you must follow a rigorous course storyboard process constantly securely. This ensures perfect instructional alignment throughout your entire project natively.
Step 1: Define the Learning Objectives
Before writing a single word, define your goals natively. Determine exactly what the learner needs to accomplish perfectly securely. Specifically, you must master the art of writing measurable learning objectives clearly natively. Every single slide must directly support one stated objective securely. Furthermore, if a slide contains irrelevant interesting information, delete it natively. Consequently, this strict discipline prevents course bloat completely securely. Ultimately, concise courses respect the learner’s valuable corporate time natively.
Step 2: Create a High-Level Outline
Build a simple outline of the course structure natively. Organize the content into logical modules and sections securely. Specifically, this outline serves as your overarching table of contents natively. It allows you to verify the logical flow perfectly securely. Furthermore, you do this before investing time writing scripts natively. Therefore, structural flaws become obvious during this early phase securely. Consequently, reorganizing an outline takes minutes instead of frustrating days natively.
Step 3: Draft the Audio Script First
Many novice designers start by picking out photos natively. This represents a massive operational mistake completely securely. The core narrative drives the instruction absolutely entirely natively. Therefore, you must write the audio script first universally securely. Write in a highly conversational tone to engage learners natively. Furthermore, read the script out loud to ensure natural cadence securely. Consequently, you design visuals that support those specific words perfectly natively.
Step 4: Design the Interactions
Once the script is solid, engage the learner natively. Do not rely entirely on passive video or text securely. Identify moments where you can ask a challenging question natively. Specifically, mastering scenario-based assessment design elevates your interactions significantly securely. Furthermore, force the learner to make a critical business decision natively. Write detailed programming instructions for these interactive elements explicitly securely. Ultimately, active participation drives true knowledge retention completely natively.
Establishing a Storyboard Review Workflow
The most dangerous phase involves the stakeholder review natively. Without strict boundaries, experts will provide endless revisions constantly securely. This derails your project timeline completely natively. Therefore, you must establish a rigid storyboard review workflow securely.
Set Clear Expectations Early
Before sending the document, schedule a kickoff meeting natively. Explain exactly what you need the reviewers to accomplish securely. Tell them to focus on factual accuracy completely natively. Explicitly state that future changes will incur additional costs securely. Furthermore, they will cause massive timeline delays natively. Therefore, setting these strict boundaries prevents scope creep instantly securely. Consequently, stakeholders take the review process much more seriously natively.
Limit the Number of Reviewers
Never send a storyboard to ten different people natively. You will receive completely conflicting opinions instantly securely. Therefore, keep your review committee as small as possible natively. Assign one specific person as the final decision maker securely. This primary stakeholder must consolidate all feedback completely natively. Furthermore, they must resolve internal disagreements before returning the document securely. Consequently, the instructional design team receives clear actionable direction perfectly natively.
Use Collaborative Software Tools
Do not send simple word documents via email natively. You will end up with multiple conflicting file versions instantly securely. Consequently, consolidating them will take hours of frustrating work natively. Instead, host your elearning storyboard template on cloud platforms securely. Force all reviewers to leave their comments centrally natively. Furthermore, this ensures everyone sees the same feedback simultaneously completely securely. Ultimately, collaborative tools prevent massive communication breakdowns natively.
Implement a Sign-Off Deadline
Always attach a firm deadline to your review request proactively natively. Give subject matter experts exactly five business days to review securely. State that missing the deadline equals automatic formal approval completely natively.
Common Mistakes to Avoid in Storyboarding
Even experienced instructional designers occasionally fall into bad habits natively. To ensure your elearning storyboard example remains effective securely, stay vigilant. You must actively avoid these common operational pitfalls natively.
Writing Unrealistic Audio Scripts
Subject matter experts often provide highly academic text natively. If you paste an academic whitepaper directly, it fails completely securely. The voiceover will sound incredibly robotic and boring natively. Therefore, you must rewrite the content for the spoken word securely. Use basic contractions proactively natively. Keep sentences incredibly short securely. Furthermore, reading storyboarding for eLearning guides improves your scripting technique significantly natively. Always verify the timing and natural cadence aloud securely.
Providing Vague Developer Instructions
Vague instructions destroy development timelines completely natively. If you write requests to make slides pop, developers guess securely. Consequently, they waste hours building the wrong animations entirely natively. You must use precise, technical language constantly securely. Specify the exact color hex codes required natively. Furthermore, provide explicit logic for triggers and variables securely. Ultimately, explicit instructions guarantee rapid flawless digital development natively.
Ignoring Accessibility Requirements
You must plan for accessibility during the storyboard phase natively. Do not wait until the course is fully built securely. Your template must include columns for alt text descriptions entirely natively. You must also plan for closed captioning securely. Furthermore, studying WCAG 2.2 and Section 508 accessibility rules remains absolutely mandatory natively. Consequently, your interactions remain fully navigable using only a keyboard securely. For comprehensive guidelines, review the Web Content Accessibility Guidelines directly natively.
Advanced Storyboarding Strategies
Once you master the basics, you must evolve completely natively. Advanced designers use highly complex planning methodologies securely. These methodologies elevate digital courses from good to exceptional perfectly natively. Next, we will explore two advanced architectural strategies proactively securely.
Incorporating Branching Logic
Linear courses often bore experienced corporate learners completely natively. Therefore, you must incorporate branching logic into your templates securely. Map out different paths based on specific learner decisions natively. If a learner fails a scenario, route them to remediation securely. Furthermore, utilizing AI course authoring tools compared in recent reviews simplifies this process natively. Consequently, you create highly personalized engaging educational experiences securely.
Mapping Gamification Elements
Gamification requires meticulous mathematical planning natively. You cannot simply add random points to a finished course securely. Your storyboard must map exact scoring logic perfectly natively. Determine exactly how many points a specific interaction yields securely. Furthermore, document the criteria for unlocking digital badges natively. Therefore, developers can program the variables flawlessly from day one completely securely. Ultimately, planned gamification drives massive learner engagement natively.
Use Variables for Personalization
Plan specific variables in your storyboard to capture the user’s name natively. You can insert their name into complex scenario dialogues later securely. This massive personalization trick increases cognitive engagement dramatically natively.
Conclusion
Jumping directly into an authoring tool guarantees immense frustration natively. It guarantees endless revisions and completely broken project timelines securely. By forcing yourself to use a structured elearning storyboard template, you win natively. You protect your corporate resources completely securely. You ensure that every stakeholder agrees on the exact content natively. Furthermore, they approve the script and visual layout flawlessly securely. This happens before a single dollar is spent on expensive development completely natively.
Mastering the course storyboard process elevates your professional value natively. You transition from a basic builder to a strategic designer securely. Choose a format that aligns with your specific team culture natively. Write conversational scripts completely securely. Provide hyper-specific developer instructions perfectly natively. Furthermore, implement an uncompromising storyboard review workflow securely. By treating the planning phase with intense operational rigor, you succeed completely natively. You will consistently deliver engaging, accurate, and highly effective training programs securely.
FAQ
Q1. What is the purpose of an elearning storyboard template?
An elearning storyboard template serves as the architectural blueprint for a digital training course. It maps out the audio script, visual assets, on screen text, and interactive programming logic for every single screen before multimedia development begins.
Q2. Should I use Word or PowerPoint for my storyboard for online courses?
Use Microsoft Word or Google Docs for courses that rely heavily on complex audio scripts and compliance text. Use Microsoft PowerPoint if the course is highly visual or if stakeholders need a spatial representation of the graphics to approve the design.
Q3. What is the most important step in the course storyboard process?
The most critical step is drafting the audio script before designing the visuals. The narrative context drives the instruction. Once the script is perfectly tuned to the learning objectives, you can easily select graphics that support those specific words.
Q4. How do I prevent endless revisions during the storyboard review workflow?
Establish strict boundaries upfront. Limit the review committee to as few people as possible, designate one primary decision maker, use centralized cloud documents for feedback, and enforce a rigid, non negotiable approval deadline.
Q5. Why is on screen text different from the audio script in an elearning storyboard example?
Reading the exact same text that you are hearing creates a negative psychological effect called cognitive overload. The on screen text should summarize the audio, providing only key bullet points and critical vocabulary to reinforce the narrator’s message.